


Realistic FUR. 20 Fur Brushes 4 CSP
in Add-Ons
DOWNLOAD NOW Report
228
1
YOU MAY ALSO LIKE:

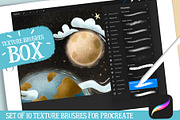


**20+ sub tools (brush presets) for painting realistic fur in CLIP STUDIO PAINT**
The set contains 20 brush sub-tools, but the brushes #2,3 and 8, depicting the fur from aside,
have 2 options each other, for right and left-directional hair growth.
**So, in fact, the Set contains 23 brush sub-tools.**
**Dear Colleagues, the Set is updated on March 5, 2020.**
All brushes in the set are edited, optimized, and ordered. Fixed minor bugs.
---
Dear Colleagues,
I've worked to learn how to draw realistic fur quite a lot of time. And I can be proud that I'm reached this goal. To simplify matters I created a series of brushes for myself, and I've decided to share them with you. These brushes allow to create a high-quality realistic fur image, that's why I made them not free. But I'm sure, you'll appreciate the assistance that they will bring you in the work!
*
**In fact, I prefer working in Photoshop. But I used the same brush prints to create Sub Tools for Clip Studio Paint, added similar settings and tested them to be sure: these sub tools allow to get such results as I reached here.**
*
*Sincerely yours, Eldar*
**ALL BRUSHES WERE MADE USING 1.6.3 VERSION of CLIP STUDIO PAINT.**
You'll receive:
- ZIP archive with 23 *.sut files (Clip Studio Paint sub tool files)
- PDF with tips and instructions
-----
** TIPS and NOTES:**
• How I'd advise painting furry volumes. As you know, there's a number of basic shading technics in painting and drawing,
and I like this one as the most appropriate for me — I find it one of the most rational by painting the fur —
to start coloring with a neutral, halftone local color, then shade it according to the volume and lighting,
then add layers of the fur with colors a bit lighter than underlying shading.
• You can try at first to place basic shading with a simple brush, hard or soft (as you can see in the video with demonstration),
and then put the fur strands above, according to the form and lighting.
• After, as usual, it's needed to make some areas deeper (darker) — for example, shaded areas deeply among strands
near their roots — or set some light and highlight accents in the lights.
• You can experiment also with layer' and brush blending modes, such as Soft Light, Screen, Multiply, etc.
• As in painting or drawing at all, I'd recommend proceeding from common, main shapes to partial ones and details:
firstly, specify the main big volume, lights, and darks, then put non-detailed fur strands using matching brushes
and then make the detailing with detailed fur brushes.
• In the end, I'd add some the sharpest strands or hairs, maybe blur or darken some of the underlying strands,
light up some of most visible, highlighted. Try to make some of them softer of sharper, darker or lighter in the finish or work,
kind of post-processing. Add some highlights, specular.
• As it was said before, the brushes # 2,3 and 8 have two options for each one, for left and right hair growth direction3
| File Type: | |
| File Size: | 11.94 |
| Dimensions: | 2500 x 2500 |